Every photographer approaches an event, and each part of the day, differently. Some use available light only, some use a camera mounted flash, and some use OFF camera flash. My QFlashes count as OFF camera flash. They operate by remote, and I set the power level manually. They are a little bulky, and sometimes make for logistical challenges (I'm carrying all of my things by myself) but the final result is SO worth it. I LOVE these QFlashes. Light that comes from a corner, a side, or behind the subject can add depth, dimension and detail.
I just posted about white balance, in another blog post. The Q Flash has a huge impact on white balance. It gives me a strong, clean white light, which is super helpful. The photo is usually stronger, and less difficult to edit, which saves me time on the computer.
I'll tell you a secret. I'm a self taught photographer. When I was first photographing weddings 16 years ago, I relied on the flash on my camera, I had no idea. It didn't take me long to realize that was getting me nowhere...FAST. I don;t love lugging this setup around, but I wouldn't trade the results for anything.
 |
| This is how happy my QFlash makes me sometimes. |
 |
| QFlash is set up behind a pillar of the church off to the right side. |
 |
| Qflash is over to the left side. |
 |
| If this had been shot as "available light", the sky wouldn't have had as much detail...I would have been exposing for the subject (my bride and groom) and the sky would have been blown out...no detail at all, just white. Tis true! |
 |
| Qflashes and white gazebos work well together. I hide the Qflash behind my bride and groom, and then make exposure adjustments to create this effect. |
 |
| With long church aisles, it's nice to be able to position TWO Qflashes...one at the end of the aisle (like in this photo) and one at the front, closer to me. The flash on my camera could never reach all the way to the end of the aisle...the exposure would be horrible. |
 |
| Backlit with the Qflash and filled with the flash on camera. |
 |
| Again, white gazebo and hidden Qflash. |
 |
| Qflash hidden behind bride and groom. NO fill from on camera flash. |
 |
| Lit from the right side, this cake takes on extra dimension. This would have been a completely different photo without it. A flash from the front would just have made for really awful shadows on the wall behind the cake. |
 |
| Now, this is an example of a photo I do LIKE with the Qflash, but it also shows one of the risks associated with its use...aperture flare. That green circle in the upper left corner is from the flash catching on the lens of my camera. If I have time to get another shot, I can usually eliminate the flare by moving slightly. |
 |
| Backlit with Qflash and fill from on camera flash. |
 |
| Backlit with Qflash, no on camera fill flash. |
 |
| Same scene as above, a half minute later, but front lit with QFlash. No backlighting. |
 |
| Qflash is directly behind the bride and groom. This can be tricky. Everyone dances differently, and by default a dance means they're moving. I am always dodging and crouching to get that flash behind their heads. |
 |
| Qflash behind couple and on camera fill flash. |
 |
| Qflash behind couple and on camera fill flash. |
 |
| Another example of the Qflash causing aperture flare. I had two set up...the one on the left did not get caught in my lens, the one on the right did. It's ok. I still like it! |
 |
| Qflash set up to the left of the dress, to give a little ooomph and dimension. |
 |
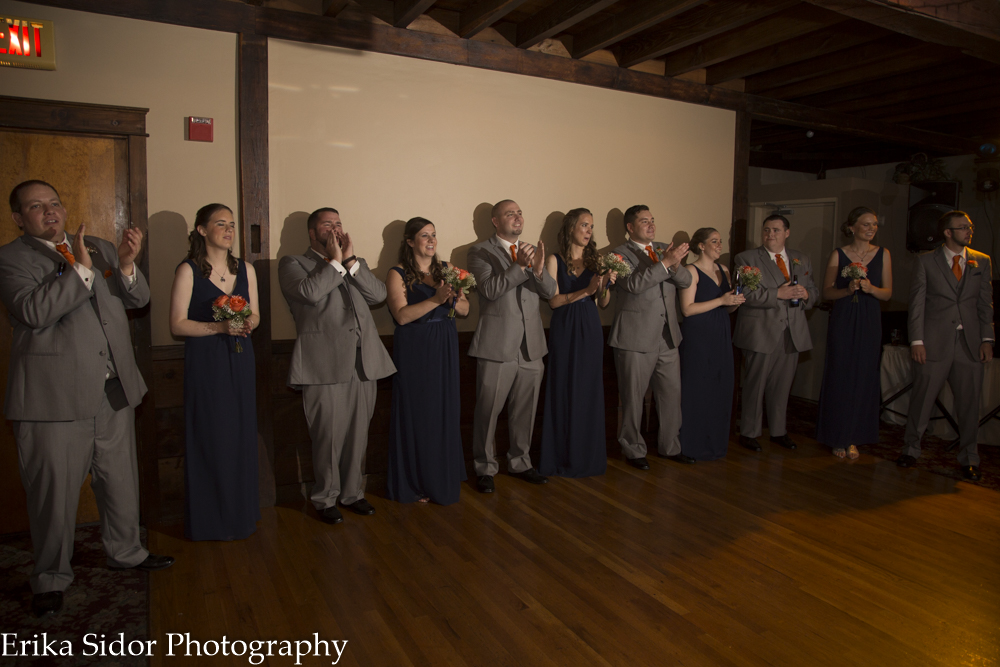
| Qflash set up to the left. This was a tight space to work in...low ceilings, tight seating, and a full bridal party. This is my assistants photo, I guess I got caught in it. |
 |
| Reception rooms look really nice with a Qflash set up to rake the light across the tables. |
 |
| A misty night, and a wide environmental shots with the Qflash in the gazebo. THIS gazebo is brown, not quite as much reflection as with white ones. |
 |
| On sunny days, I always bring my groups into the shade, and then use 2 Qflashes to fill. This helps balance out the exposure for the areas around them that are being hit by sun, and yet no one actually has to BE in the sun. |
 |
| Dancing and Qflashes...I generally drag my shutter a bit, bring in some ambient light, and pop the Qflash (or two). I like the effect. My main Qflash is off to the right side. |
 |
| Qflash off to the right side, set high and aimed down at my bride. |
 |
| Exposure set for the sunset, then add in the Qflash to light the couple. |
 |
| Qflash off to left side. One of the FEW times during ceremony I dared to use it. |
 |
| Another Qflash set at end of aisle so that as they exit church, i can use that one for lighting. Each Qflash can be set to a different channel, so that the one I had in the front of the church isn't going off unnecessarily. |
 |
| Qflash hidden behind pillar to left. |
 |
| Qflashes for group, exposure set to balance sky/sunset and bridal party. |
 |
| Qflash hidden behind couple and on camera fill flash used also. |
 |
| Dramatic lighting courtesy of Qflash set next to wall on left. |
 |
| Qflash hidden behind bride and groom, light bounces off of white church entryway. |
 |
| Qflash to left side, no fill flash. |
 |
| Qflash set up in front hall with bride and groom, fairly low power, allowing for ambient light in main church space to come into image. |
 |
| Qflash to left, no fill flash. |
 |
| One of the downsides to Qflashes (they're set in place and on a tripod) is that sometimes you can get funny shadows. This one, however, made me laugh, so I kept it. |
 |
| Qflash off to right, fill flash on camera. |
 |
| Qflash at left side of dance floor. |
 |
| Qflash to left side of dance floor. |
 |
| A huge, spontaneous group shot...one Qflash, plus on camera flash. |